In the last tutorial, we discussed how to deploy Llama3-8B to AWS. In this tutorial, we will deploy Llama-3 70B to AWS.
Introduction to Llama3
The 70B version of LLaMA 3 has been trained on a custom-built 24k GPU cluster on over 15T tokens of data, which is roughly 7x larger than that used for LLaMA 2. [1][2]
How good is it
According to famous leaderboards like LMSYS and hugging-face, the LLaMA-3 70B outperforms GPT-4 base from OpenAI, and Claude 3 from Anthropic. Similarly among the open-source models the LLaMA3 70B outperforms most famous open-source models like Command R+, and Mistral Large.
The instance size required for Llama3 70B
As a basic rule of thumb, the size of the parameter is the space it needs on the disk. However, there is usually an overhead when loading it in memory, so roughly a 1.5x-4x the size it takes on the disk. Since LLaMA3-70B has 140 billion params. It roughly requires 140 GB storage, and around 200 GB of VRAM.
Which instance to choose on AWS
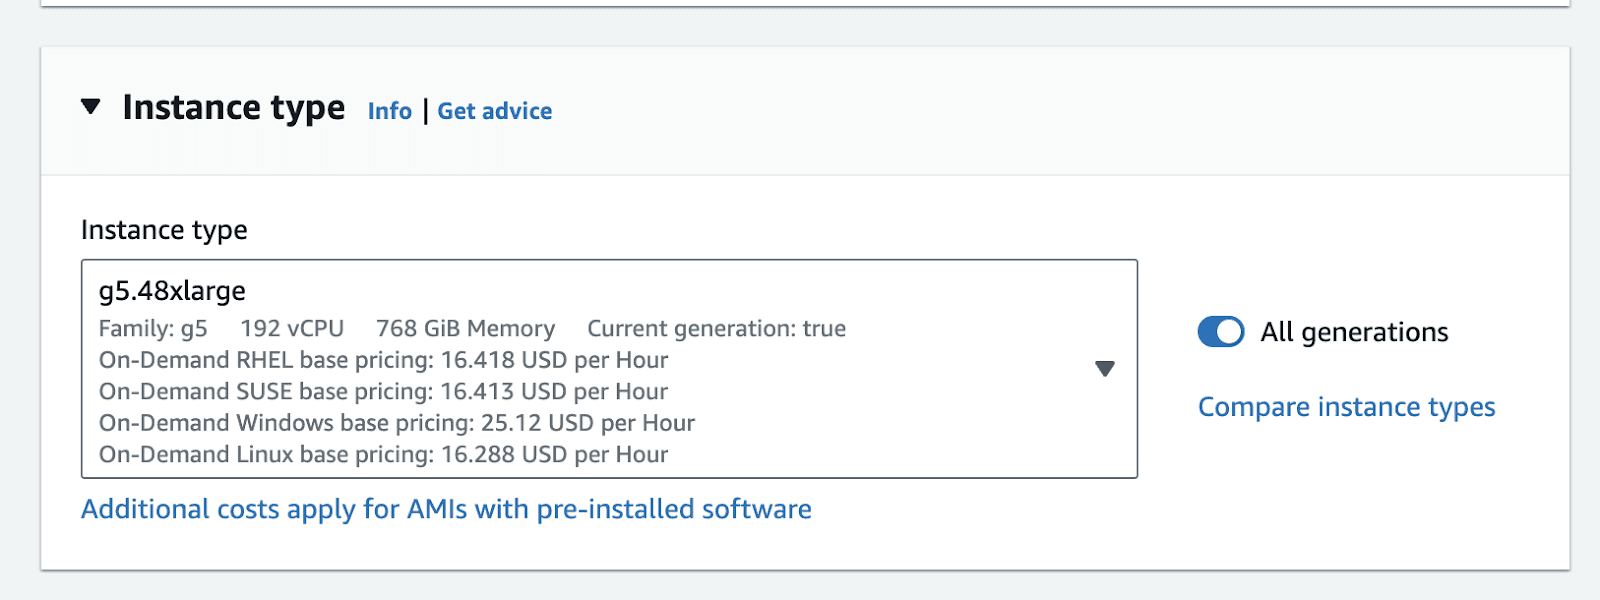
We want to go for instances that are optimized for compute with a single GPU, preferably one with the latest version. Deploying a model of this size is tricky as no single instance provided by any cloud provider has this much memory. For this purpose, it's better to choose a multi-GPU instance. For this tutorial, we will choose a g5.48xlarge instance on AWS. It has a total of 192GB vRAM (8 x A10 GPU). [3]
Cost and Pricing for Llama3 70B
All EC2 instances have on-demand pricing, unless they are reserved. This means that you are charged for the amount of time it's running. You will not be charged if you stop the instance. The price for a g5.48xlarge in US-east-1 is roughly 16.288$/hr. This amounts to a total of 11,890$ per month, if it's always on. Therefore, it is always better to attach certain triggers to your instance to stop it after certain inactivity. [4]
Hosting the model
First we need to determine the base image for the instance. We can choose any image as a base image, but the deep learning AMis provided by AWS come with all of the dependencies pre-configured. Therefore, we will go with one of the Amazon Deep Learning AMIs optimized for Nvidia GPUs. [5]
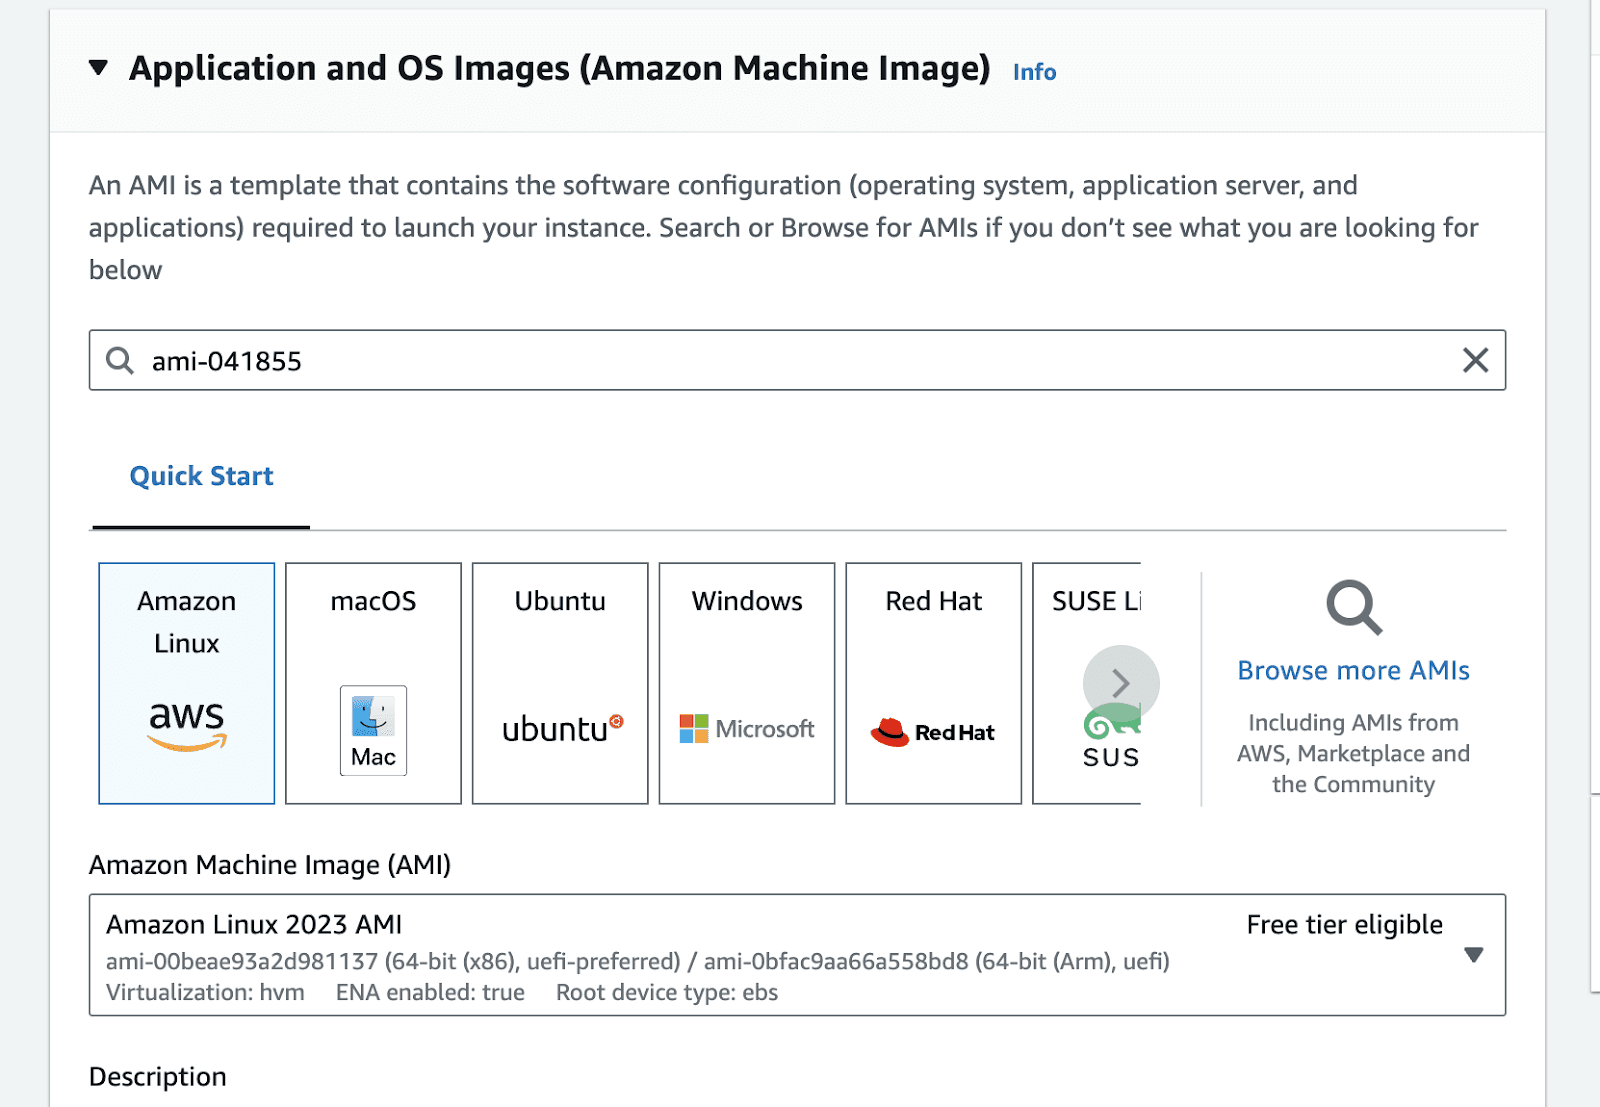
Go to the launch instance portal in the relevant zone. In the application and OS images section type ami-041855, click enter.

This will take you to the AMI search portal. Go to the Community AMIs tab , and select the Nvidia Deep Learning Base AMI.
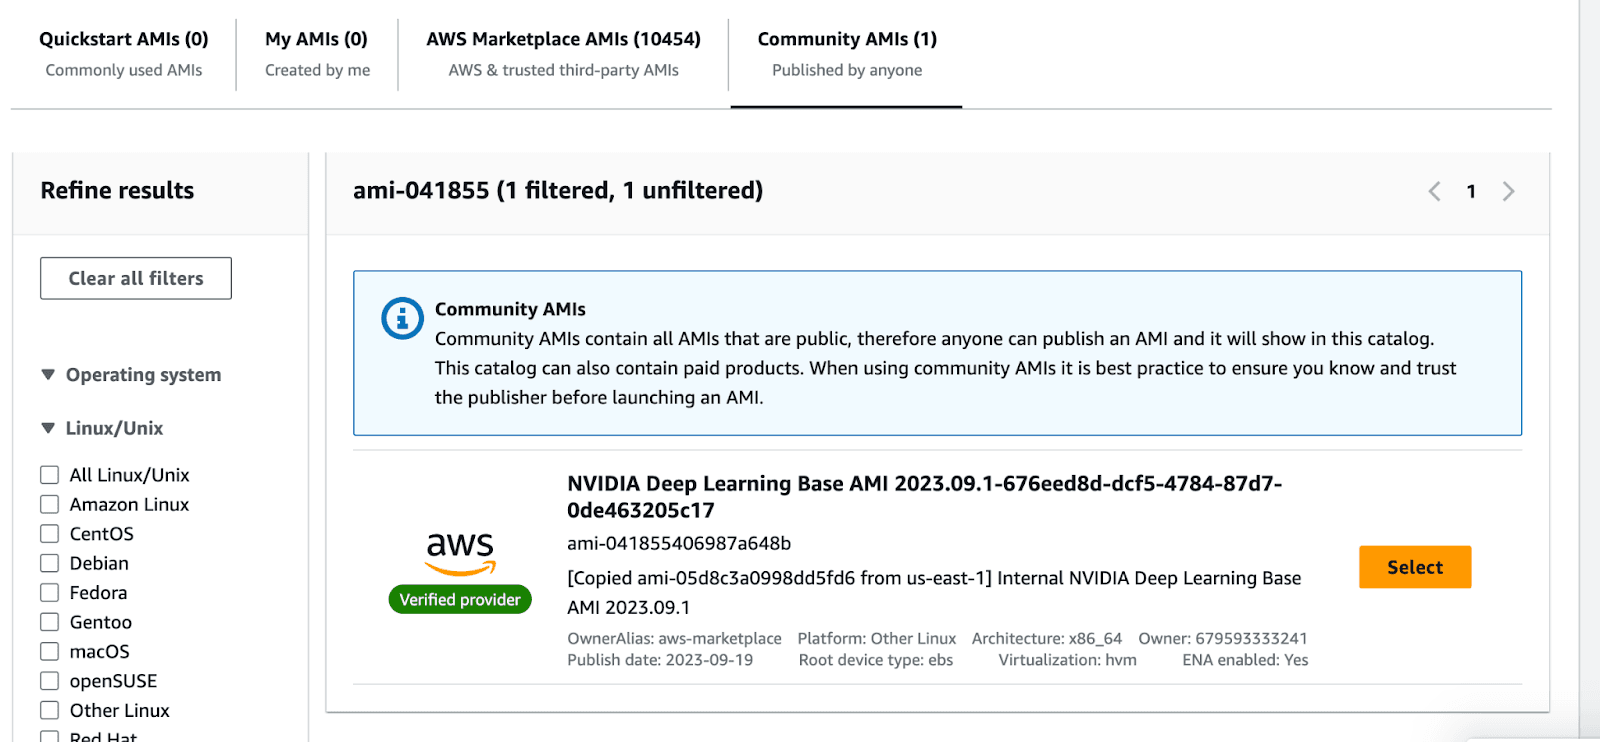
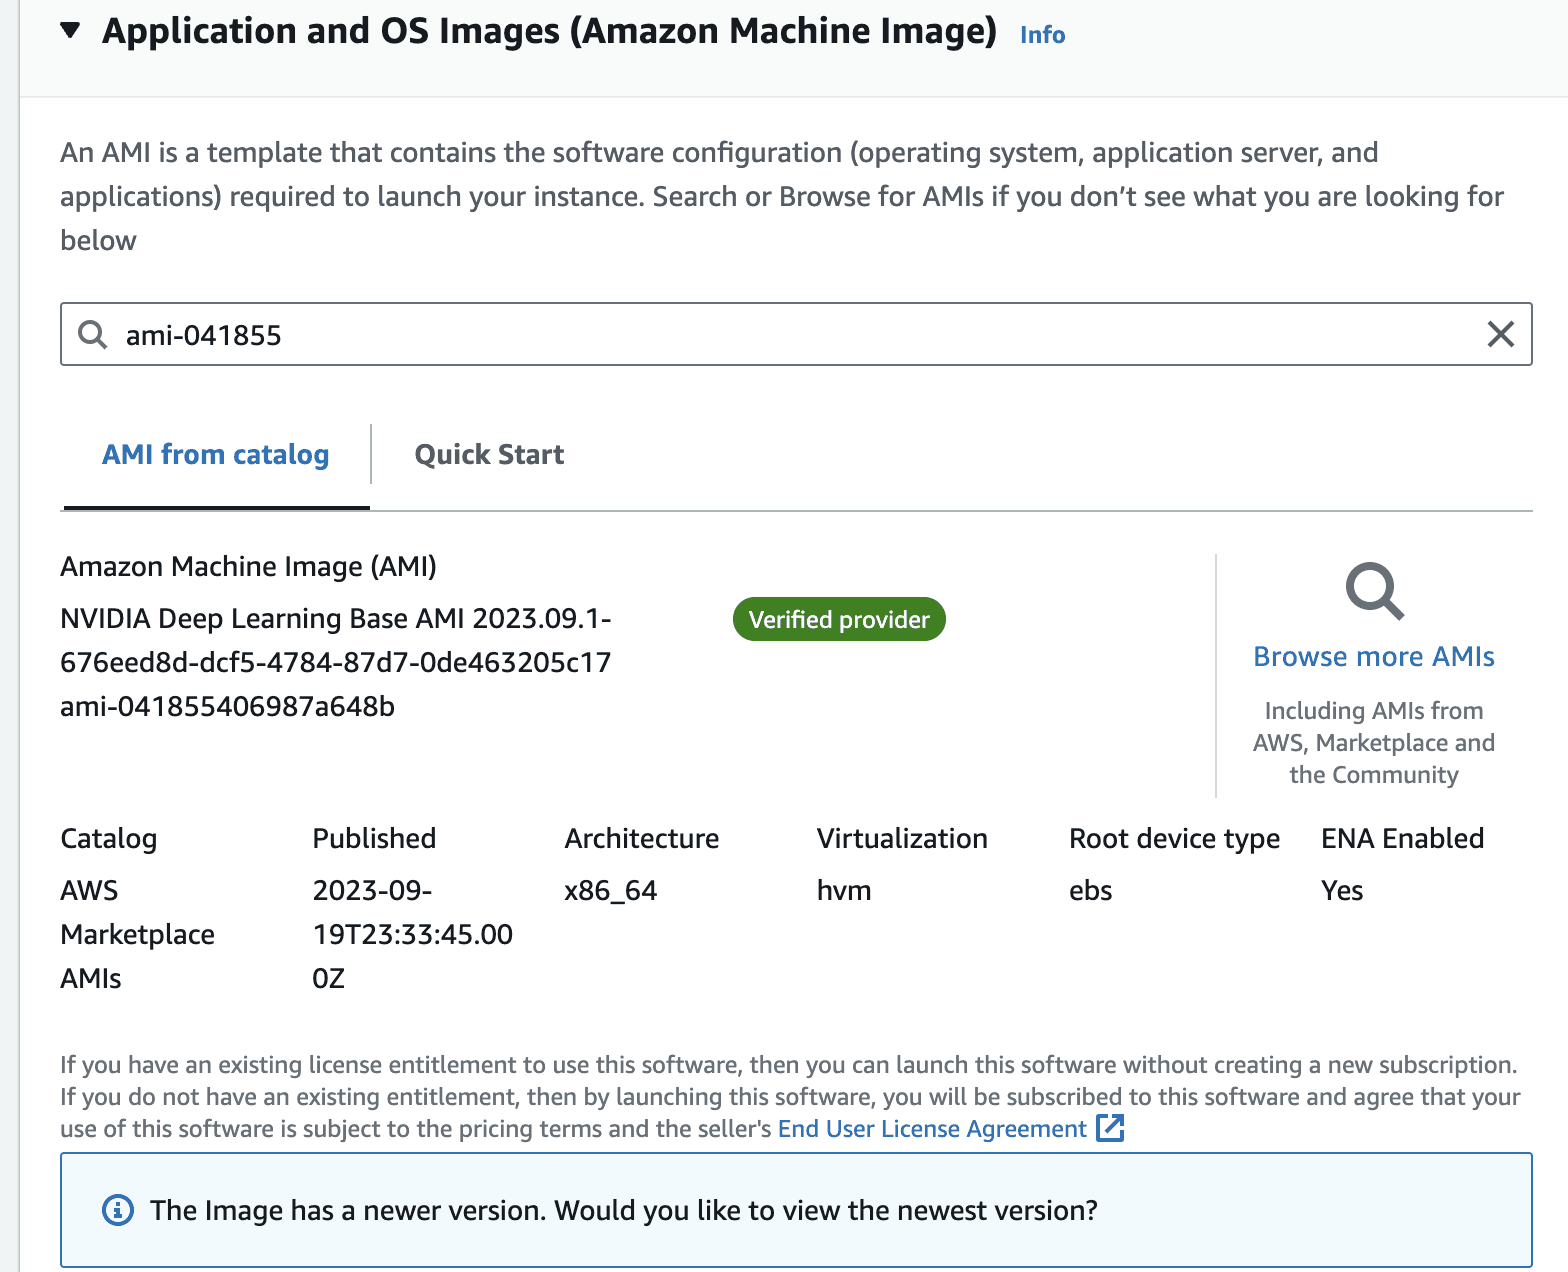
Once you select the image, the view should look like the following.
In the instance type, panel, select g5.48xlarge from the dropdown
Make sure you attach a key-pair to the instance.

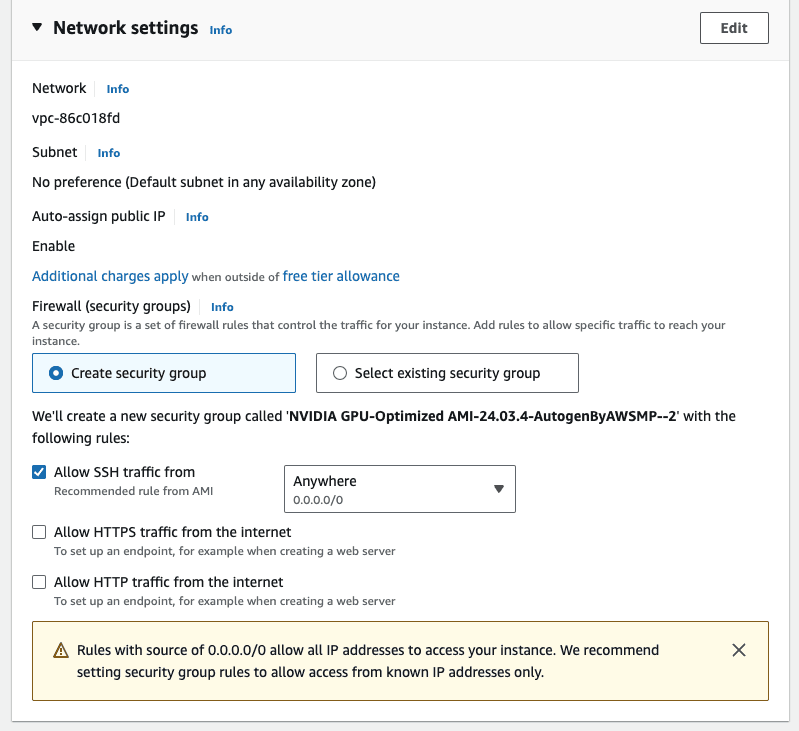
Leave the default network settings, i.e. only allow ssh Traffic for now. We will modify this in a bit.
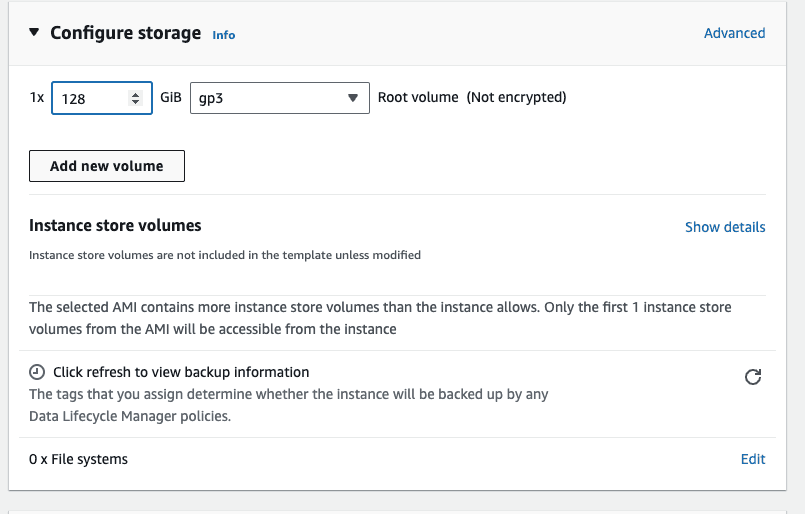
In the configure storage, attach an external volume. Attach an extra storage of 128GB, this is mostly if you want to persist some data between reboots. The default storage on the instance is ephemeral, which means that data can get lost if the instance is restarted.
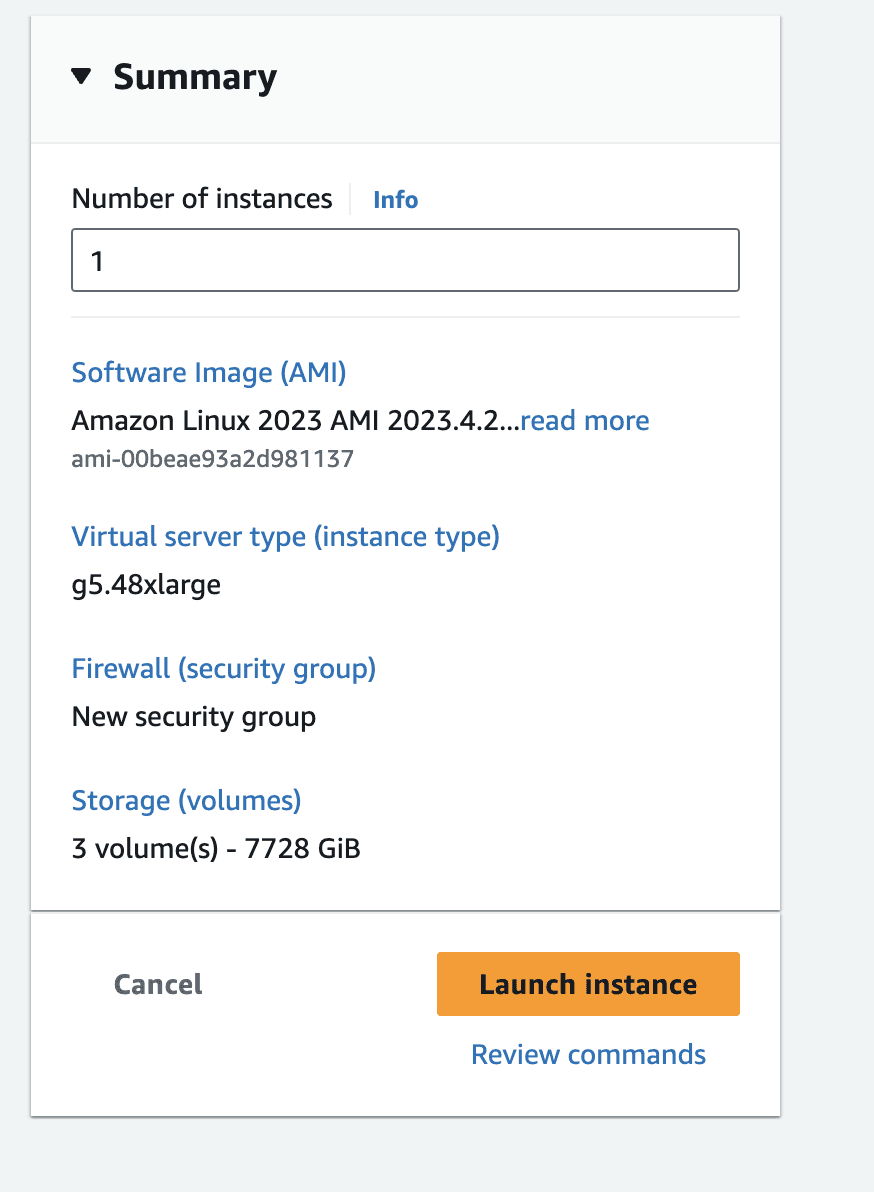
The summary of the instance should look like the following, click on launch instance
Once the instance is running, modify the security group to allow incoming requests at port 8000. This is because our inference server will be running on port 8000.
Preparing the instance
We are going to use vLLM to serve the language model on our server [6]. vLLM is a python package designed for fast inference of open-source language models. It optimizes the inference by using multiple methods such as continuous batching the incoming queries. In a multiGPU instance this can result in faster inferences.
Once the instance is running. Establish an SSH connection to the instance from your terminal. You can do that by using the following command.
Once inside the instance, create a virtual env, and install vllm with the following command. This will take a few minutes
Because we plan to perform distributed inference using vLLM, we will use ray as a distributed worker engine. [8]
In case you encounter compatibility problems while installing, it may be simpler for you to compile vLLM from the source or use their Docker image: have a look at the vLLM installation instructions.
Launch the Inference Server
Make sure you have logged into the hugging-face portal and applied for the license. You can do that by going to the relevant model page and applying there. In our case the model that we are interested in is Meta-Llama-3-70B. Once you are approved, make sure to run the following in the terminal, to configure your hugging-face API key.
Once the download is completed, you can simply run an OpenAI compatible inference server by running the following command. The name of the model comes from the relevant hugging-face name [7]. This takes a few mins to run the server fully
Once the server is running, you will see something like the following
This means that our server is running on port 8000, and you can call it from your computer by running the following curl command.
You now have a production ready inference server that can handle many parallel requests, thanks to vLLMs continuous batching. However, it can only serve so much, if the number of requests increases, then you might have to think about horizontal scaling i.e. spinning up other instances and load balancing the requests among them. Similarly, make sure you also think about attaching a spin-down policy to the instance, otherwise the monthly bill can get pretty expensive.
Checkout our awesome apps ⬇️⬇️⬇️
If you want to chat with data and generate visualizations, please visit SirPlotsAlot
If you want to chat with Any github Codebase, please visit CodesALot
Build AI enbaled apps from a single prompt
Build full stack Apps from prompts
READ OTHER POSTS


